dinsdag 26 februari 2013

Children's Party Idea With Glass Paint

When my children were small we always had birthday parties at home. No visits to a zoo or cinema for us.
I always planned an afternoon with some food, some activity and a creative project. One of the most succesfull was making a tea light holder out of a drinking glass and glass paint.
For this is bought some inexpensive glasses in a store. With foresight I could have bought some at a yardsale or saved empty mustard jars etc.
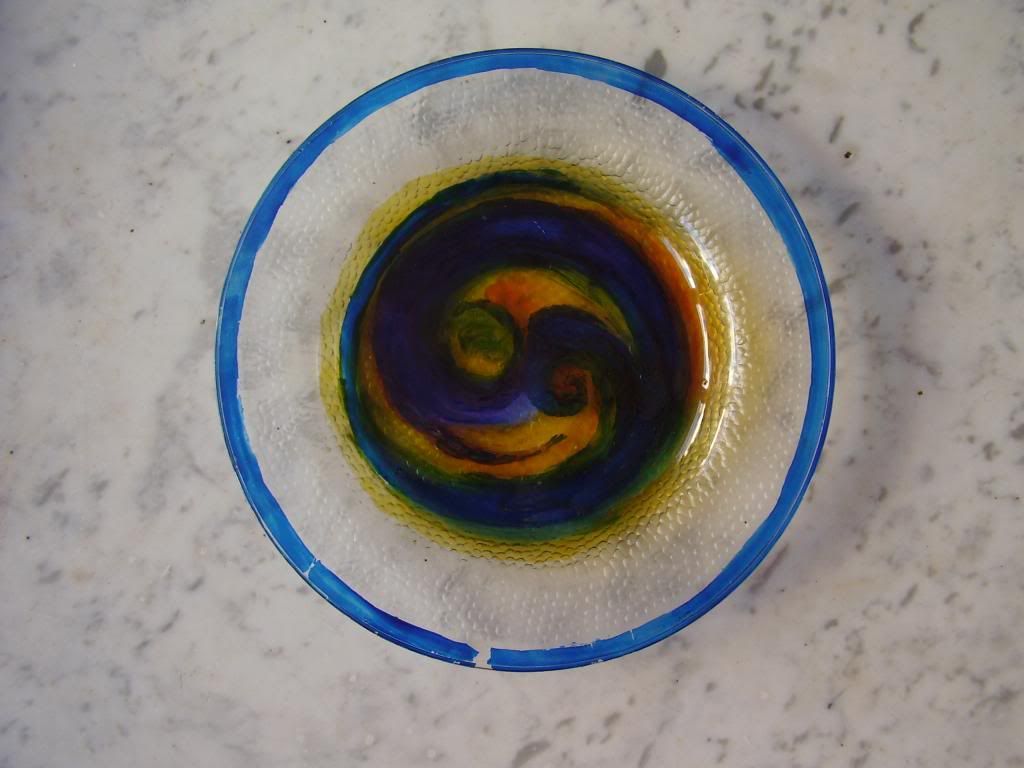
This is a photo of the one my daughter made when she was about 10-years old


After protecting my table top I gave each child a unopened tin can to put their glass on. They can use the can as a pedestel to put the glass on so they can turn their glasses bij turning their cans and don't have to touch the wet paint.I had them put their glasses upside down on the can so they could also paint the base.
Use the most inexpensive paintbrushes that you can find because the paint will ruin them.

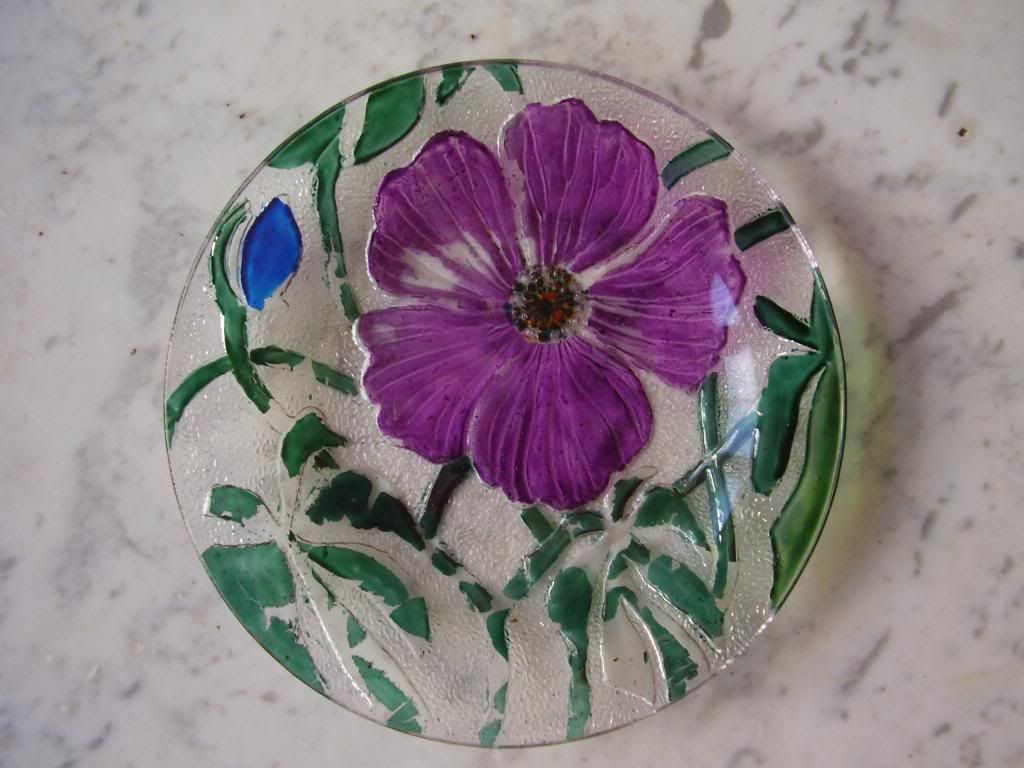
You can also decorate glass plates with the stuff. When I did this I painted the underside.
This one I made years ago. I stood it on a window ledge so the light could shine through.


As you see there is a small piece of paint missing. I have found that after years of sunlight the paint may crack and flake off a bit.
Some plates and saucers have patterns impressed in them. You can use these as a guide as to where to paint.


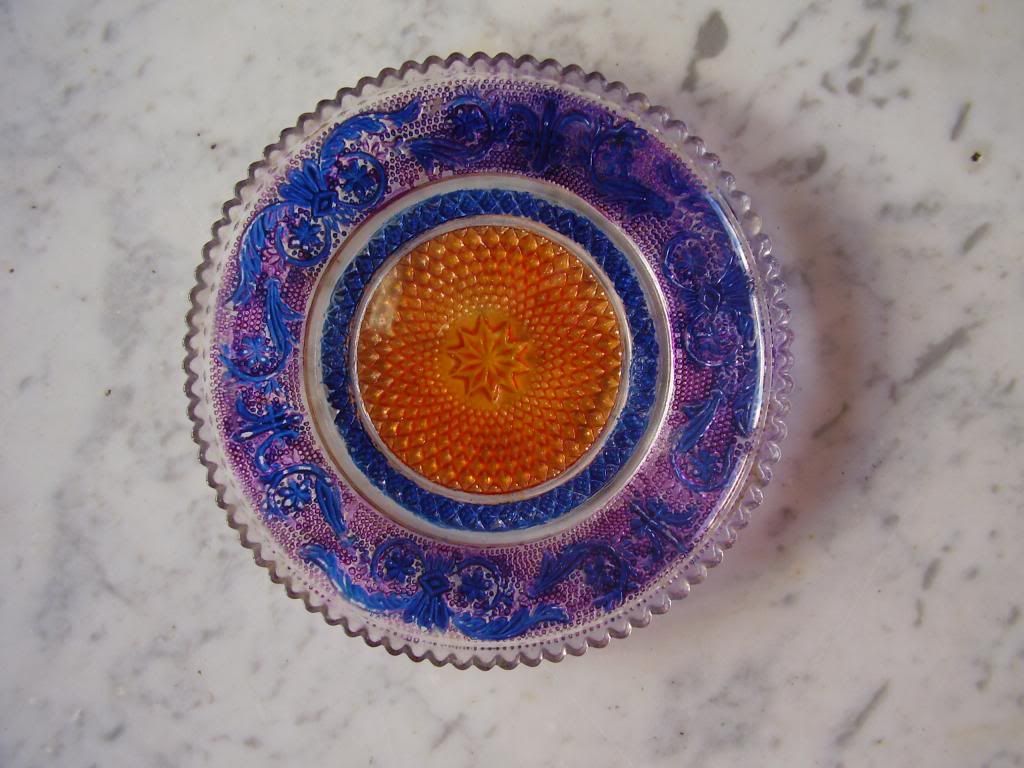
The next one is well past it's prime but I still want to show it to you as an example.


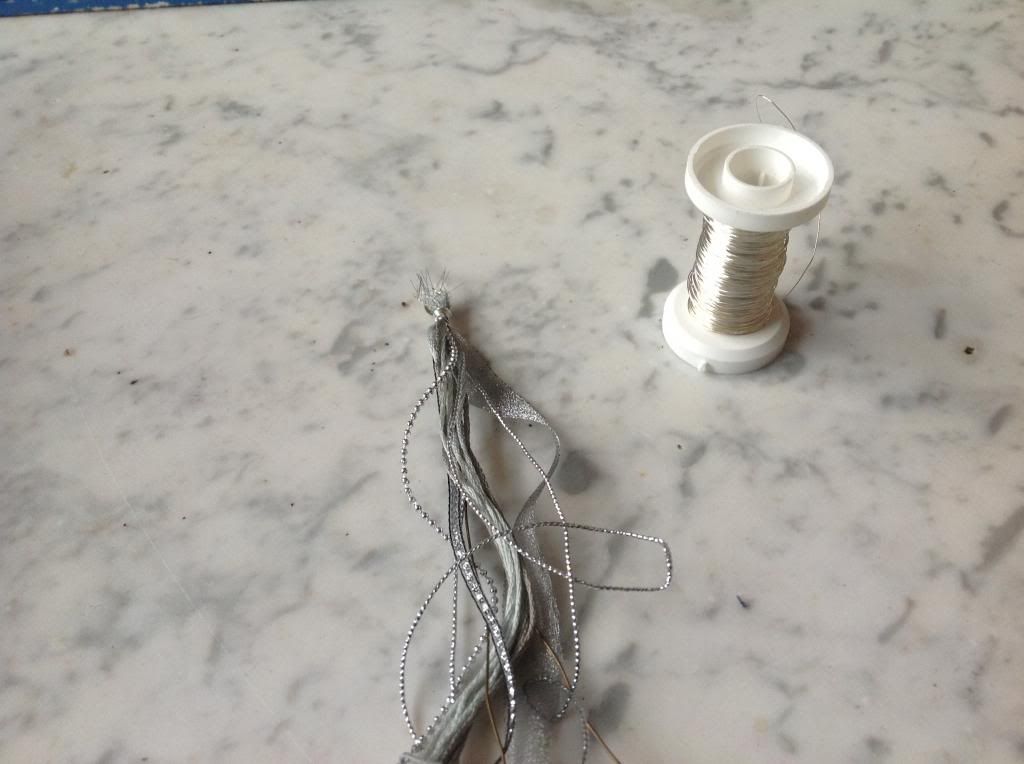
Last year I made "tiffany" candle/tealight holder using glass paint and self adhesive lead tape.


I bought a very inexpensive glass vase but you could look in a yardsale or thriftstore. Then I drew the lines where I wanted to stick the tape on with a permanent fineliner and painted the areas in the colours I wanted. When the paint was completey dry I stuck on the lead tape. 
This project is perhaps less suited for a childrens party because you have to wait untill the paint is dry before you can stick the tape on.
If you stick the lead tape on before you paint it makes the painting more difficult.
I hope I have inspired you!

maandag 25 februari 2013

Give Your Leather Couch A Facelift

If this was your couch would you buy a new one?


Last week my son said,"Don't you think it's time we bought a new couch?"
But I must admit that was before I had given it my special treatment. Last week it looked like this 


I bought this couch last century and as time flies it seems like only yesterday when we had the most terrible trouble to get it though the narrow door of our livingroom. We won't be able to get it out unless we hack it to pieces so I'm doing my best to lengthen it's life.
After we had it about 6 years a hole appeared at the front. It took a year for me to think of a way to fix it. At first I thought of cutting a large piece of leather from the back ( nobody would notice because it's backed onto a cupboard) and sewing/sticking it onto the seat part but I was afraid I wouldn't be able to do it neatly. Eventually I shoved a small piece of leather through the hole and then spreaded some glue on it and then pulled the edges of the hole together and stuck it down. I put something heavy on top untill the glue was dry. This worked very nicely and you could hardly see there had ever been een hole there!
The piece of leather I used I had saved from old leather articles which weren't in a good enough state to donate such as broken purses, gloves, shoes etc.
To get rid of the white stripes caused by tiny tears in the leather I use shoe polish! My couch is green with a blue undertone and I couldn't find shoe polish in the right colour so I used dark blue. I warmed the shoe polish a bit to make it softer and easier to spread out and then I got a clean cotton cloth and a lick of polish and rubbed the polish into the cracks. When all the white was gone I left the polish for a few hours to soak into the leather. Then I got a shoe brush and buffed the area untill it gleamed. After that I got a clean duster (a soft cotton cloth) and rubbed as hard as my little arms would let me. You will notice that your duster will turn blue or brown or black but this doesn't matter. This is to remove the excess shoe polish so it doesn't rub off on your clothes. When hardly any colour comes off anymore you're finished. I wouldn't let any visitors with a white skirt or trousers sit on the couch the first few days. I usually spread an old bath towel over the area just in case.
I have done this twice now and it works well for me. Last time I mixed some leather polish in with the shoepolish but I find this gives less of a shine. But this could be fine if you're couch is mat leather.
I would be lying if I said my couch now looks as good as new but thanks to this method my couch still had a few good years left in her!

woensdag 20 februari 2013

Hair Ornament

Those of you which have followed my blog before will know that I love "decorating" myself. I love jewelry, sequins and beads.
I am 50+ and my hair is getting pretty gray around the edges but that doesn't mean that I will resign to becoming drab and boring!
I used tot visit the website "going gray looking great" very often ( before they were only on facebook) and last time I read something about hairtinsel and how wonderfull silver tinsel looked in gray hair. So I had a look on google but was shocked to find 10 strands kost €5.00! I had some yarn which had silver wrapped around it so I spent a while unraveling some and knotted two strands in my hair. I was rather pleased with the result untill the next day when I brushed one strand out and two collegues thought they were helpfull when the pointed out to me there was "something"stuck in my hair!
So I had a good think about a decoration I could make that would look as if it was meant to be there.
I also like the "Jack Sparrow look" ( I'm talking about the hair, not the teeth) and that's when I got the idea to make this...


I looked in my stash for something I could use. I tend to hoard things that I think will be usefull in the future such as ribbons from presents and packaging and even christmas decorations. I also used some cross stitch yarn in the colour of my hair.


Then I got a piece of wire and a jump ring. I wanted to use wire as a base because I have curly hair and I thought it would look weird having a straight decoration in amongst my curls. With wire I could bend it any way I wanted so it would go with the flow of my hair. The Jump ring was so I could hang the decoration on a hairslide to secure it in my hair.


Then I cut all the strands to the length I wanted and attached them with very fine wire to the wire just under the jump ring.


After this I braided ( or if you're British platted) the strands and held them in place with a clothes peg.


Then I used a piece of the same thin wire to wrap around the strands a few times after which I slid a bead over the braid/plat. I hung an ornament on the two ends of wire I used in the base by bending the wire back after placing the ornament over it and wrapped the rest over the thin wire around it to tidy it up. Lastly I cut the ends of the strands all the same length.
When it was finished I ran to the mirror, eager to see how it looked....... I was very dissapointed. It looked really stupid! Though I'm convinced it would look really lovely on someone with thick, straight, long hair!
I haven't given up on the idea yet but I think I will make al shorter, less massive one for myself next time with no wire in it. That was a bad idea.
This one will make a good bookmarker! :-)

donderdag 7 februari 2013

Use Up Your Old Wallpaper

I am a bit of a hoarder. It hasn't got to the stage that you can't see the floor in my house anymore or I have piles of stuff which reach the ceiling but I do have a problem throwing things away. I just never know what I will be able to use in the future. As a result I had a big box of partial rolls of old wallpaper, some dating back to the '70's in one of my closets.
The wallpaper in my utility room was sunbleached and a bit tatty and needed replacing but I was put off by the idea that I would have to remove the cupboards from the wall and remove the heavy cupboards and washingmachine standing against it. My husband said "why don't you just paper around them?" At first I laughed en then I thought "why not?" and that's when I got the idea of using the short bits of wallpaper I had in the box in my cupboard. I could make a patchwork wall!
The old wallpaper on the wall was vinyl and as I was afraid the bits of paper I wanted to put over it wouldn't stick properly, I carefully removed the toplayer leaving a thin underlayer of paper on the wall.
Then I used my square quiltingruler to cut lots of squares EXACTLY the same size. This part is crucial! I did choose wallpaper similar in style and colour so I didn't get a mismatch. But you could use any paper you wanted for a more spectaculair effect if you so wished.
While sticking the pieces on I regularly used a spirit level to make sure I was going straight and I let the pieces fall behind the cupboards and washingmachine were possible so the patchwork paper didn't end abruptly and you couldn't see that I had cut corners ( excuse the pun ;-))
I was very pleased with the result. I only did one wall with the patchwork, painted two others white and papered the forth with a complete roll I also had. In the end it only cost me time because I already had everything.


I also had longer pieces which I used on the walls of my stairway.


This whole excercise has been a trip down memory lane for me. I kept thinking,"we had this pattern in the hall and this one in the bedroom"etc. AND I got rid of some of the wallpaper. I still have plenty more. I shall have to have a good think about what else I could do with it.

dinsdag 5 februari 2013

Organize Your Earrings

I love jewelry and feel absolutely naked without it. I also have a lot of it including earrings. Over the years a have made and bought lots of pairs both in shops and in yardsales. Though I must admit that I put new hooks on the ones I buy secondhand for hygiene reasons.
To organize them I used to hang them all on a metal clotheshanger ( the sort you get when you pickup your drycleaning). This wasn't the best solution because they tendend to slide to one side and often fell off.
Then one day I was looking on the internet for a better way to organize them  and came across a great Idea which I simplified a bit.
I hung a piece of stiff meshing from two pieces of wire which I attached to a towelrail which I had there already but you could just as well attach it to two hooks.


I can now hang my earings pair by pair in a very well organized fashion so I can find the pair I want in the fraction of the time I needed in the past.
The original idea had the mesh attached to the back of a pictureframe which was hung on the wall. I would have done this myself had it not been for the fact that my walls are covered in quilts and pictures etc.
If you want to try the version with the pictureframe make sure you make something on the back of the frame so it comes a bit away from the wall otherwise you won't be able to hook your earings on the mesh.

zondag 3 februari 2013

Lego/Playmobil Table

A long time ago ( although it seems like yesterday) when my children were young they played a lot with lego and playmobil. I would often step on small pieces of lego left lying around on the floor and I had to take care not to step on the creations they had made. If they had really done their best I would not tidy everthing up right away but leave it as it was so they could play with it another day.
Then I had an idea... Right in the back of a closet we had an old table which had belonged to my grandmother. We had kept it as an extra table in case we had guests and needed extra places set but it was never used.
It had legs which you could screw off and an extra leaf in the middle so you could extend it.
I thought it would be a nice and usefull idea to paint the top and use it as a table my children could play on. That way everything would not be left lying around on the floor to trip over.
Here is a photo of the smaller version. I haven't botherd to screw the legs on. After all, it's the top that matters.


I can't remember what kind of paint I used. Do take care to make the design of both parts correspond with each other so your version doesn't end up like mine.

This is the extended version 


My son had a lot of water themed Lego so I made a water/beach/land version but you can paint on anything you want whether it's a city theme, desert, moon surface or farm theme.
This table didn't stop me stepping on small pieces of Lego left on the floor but it did enable me to leave out the things they had made for as long as they wanted.
Nowadays we use the table for what it was meant for. We get it out of the cupboard when the children come home for Christmas etc.