dinsdag 21 mei 2013

Drawing And Painting Using The Grid Method

I'm quite good at drawing, not as much drawing from imagination as copying things from photo's and pictures.
I'm hoping to become  a grandmother later on this year but I promised myself that I wouldn't impose any homemade things on my daughter without an explicit request from her.

Although I'm usually a little pleased with the end result when I draw or paint something ,I go through a lot of anguish and self doubt during the creative process. This self doubt has got a little less since I use the gridmethod.
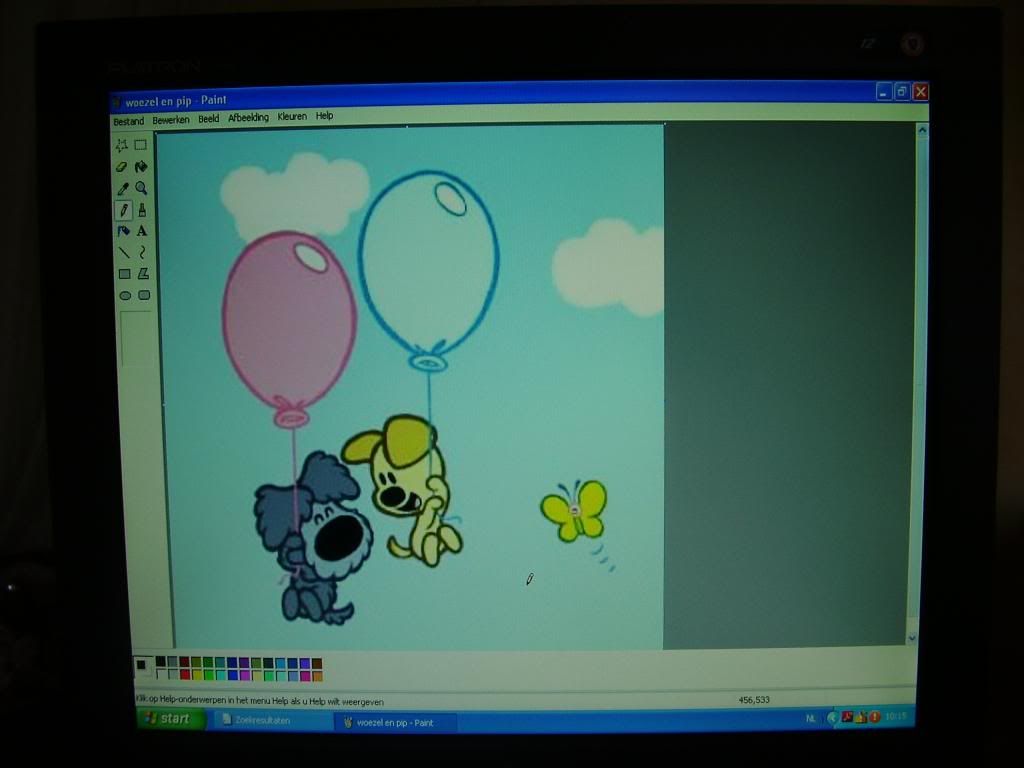
I didn't have to wait very long before I got the first request to make something. My daughter wants a Woezel and Pip theme in her nursery. I don't know if they are a world wide phenomenon or just "famous"in the Netherlands but they are cartoon characters.
I started by looking for an illustration that I liked on the internet. Make sure the photo or illustration you want to use has enough pixels so that it doesn't turn into a piece of abstract modern art when you enlarge it.


Then I overlay the photo with a piece of stiff clear plastic on which I have drawn a grid with a permanent fineliner
You will find sheets of this kind of plastic in craftstores. To draw the grid I used my quiltruler. This needs a lot of precision. I drew a grid with squares of 1cm x 1cm.
I stick the plastic grid on just above my computer screen using stickytape. Make sure the grid is absolutely straight!


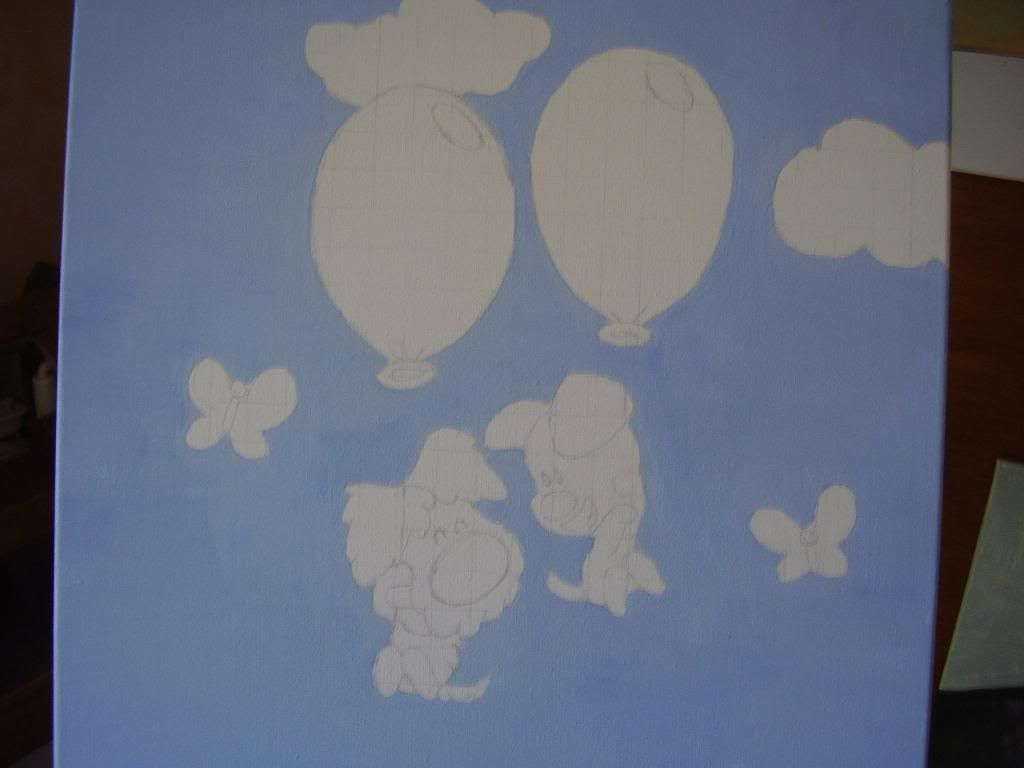
Then using a pencil I very lightly draw a grid on the surface I am going to paint or draw on also using my quiltruler. The size of the grid you need to draw depends on how much you want to enlarge the photo.
In this case I wanted to double it so I drew a grid of squares measuring 2cm x 2 cm. But when painting on a wall etc. you will probably want to enlarge it more.


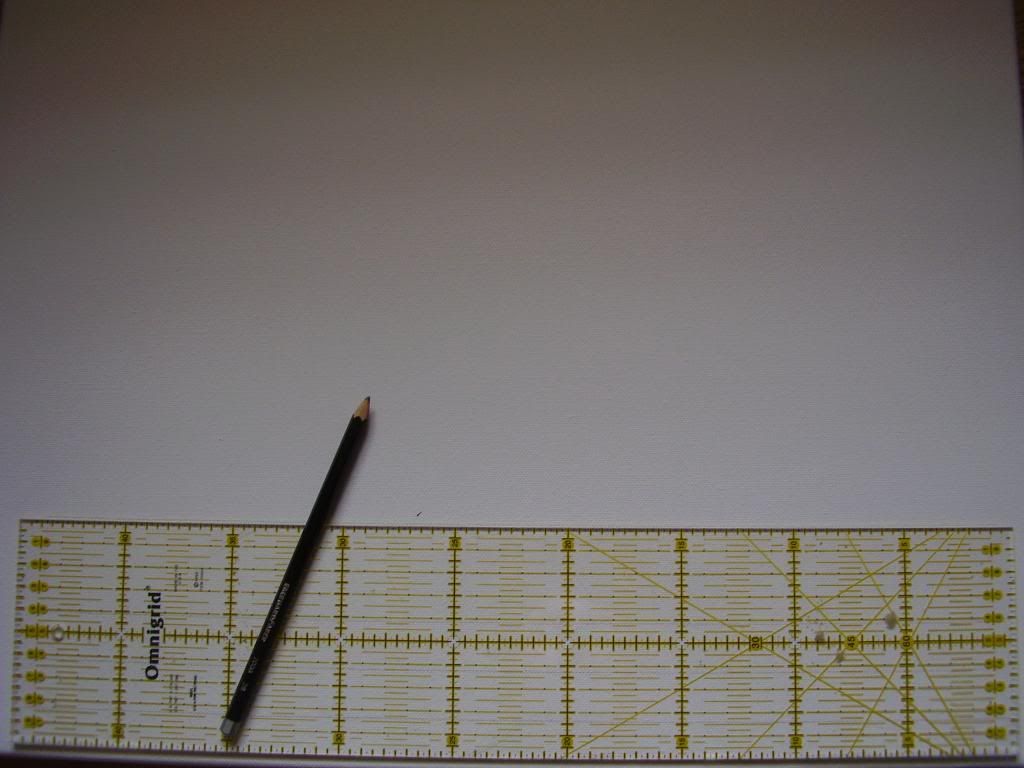
I drew this grid clearly for your benefit but if you want to try this method yourself draw it as lightly as possible because when you have finished copying you wil have to try and remove the grid by using an eraser. Sometimes if unsufficiently erased it can be seen through the paint. Especially when using watercolour paint.


Then you can start to copy the illustration. Look at each square and copy the lines in it one by one. Count carefully and find out if the illustration will fit onto the surface you want to use and try to get it in the middel ( if that is where you want it). If it doesn't fit you can adjust the size of the illustration on your computer screen.


After you have finished copying and have erased the grid as much as possible you can start painting. I used acrylic paint on this one. I started by painting the sky. I mixed enough paint to cover all of it, if you make too little you will have to mix more and it can be difficult to get the same colour. Acrylic paint can change colour a bit when dry. I had to paint three layers before the base didn't show through anymore.


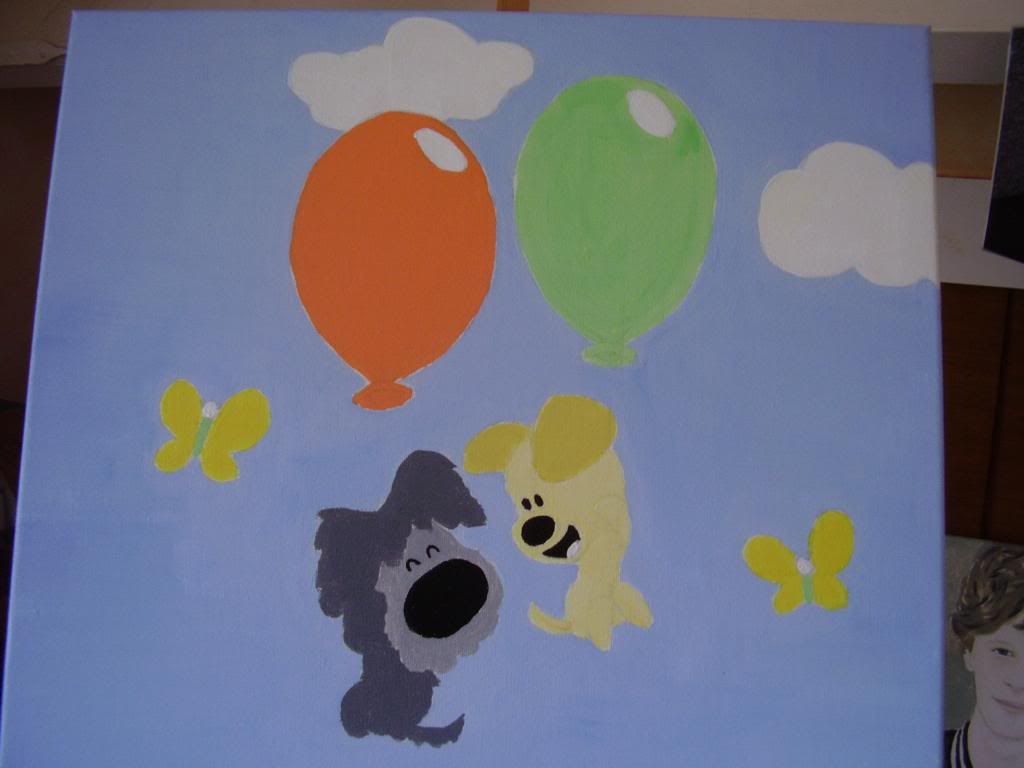
Then I painted the other features. I waited to do the black bits untill the other paint was completey dry to prevent running.


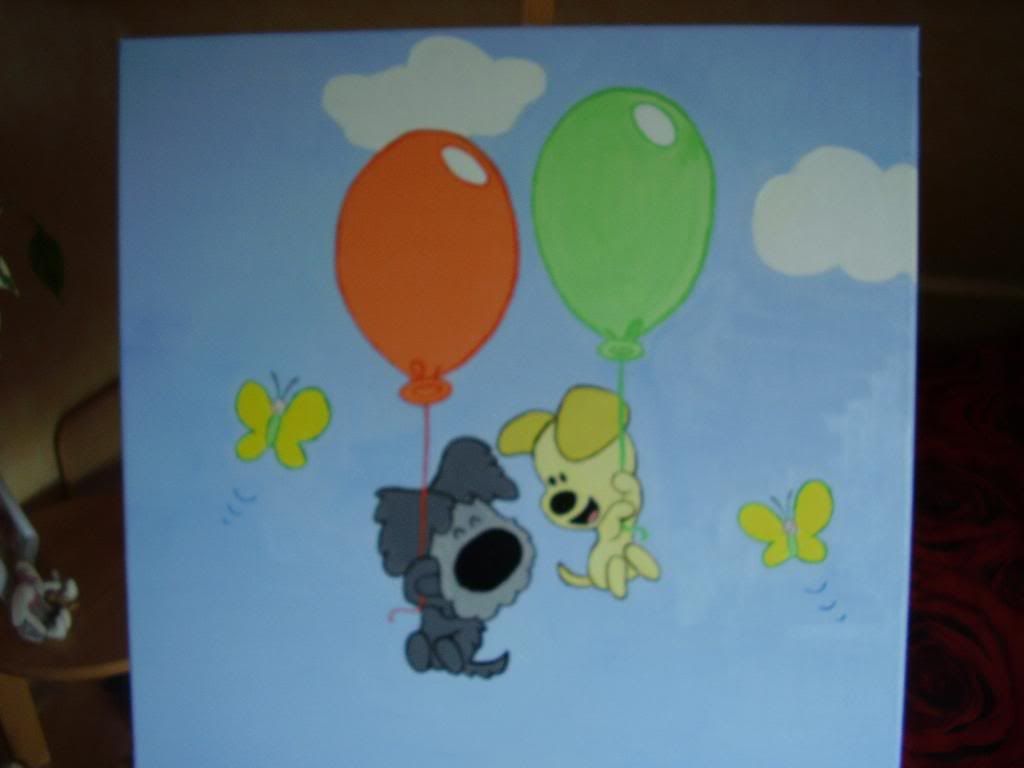
Lastly I painted the darker borders and lines. When it is completely dry your painting is finished!
Paints and canvases can be bought cheaply every so often as special offers in shops which don't usually sell these things ( at least, they are in the Netherlands) Paintings like these can make a great inexpensive gift.

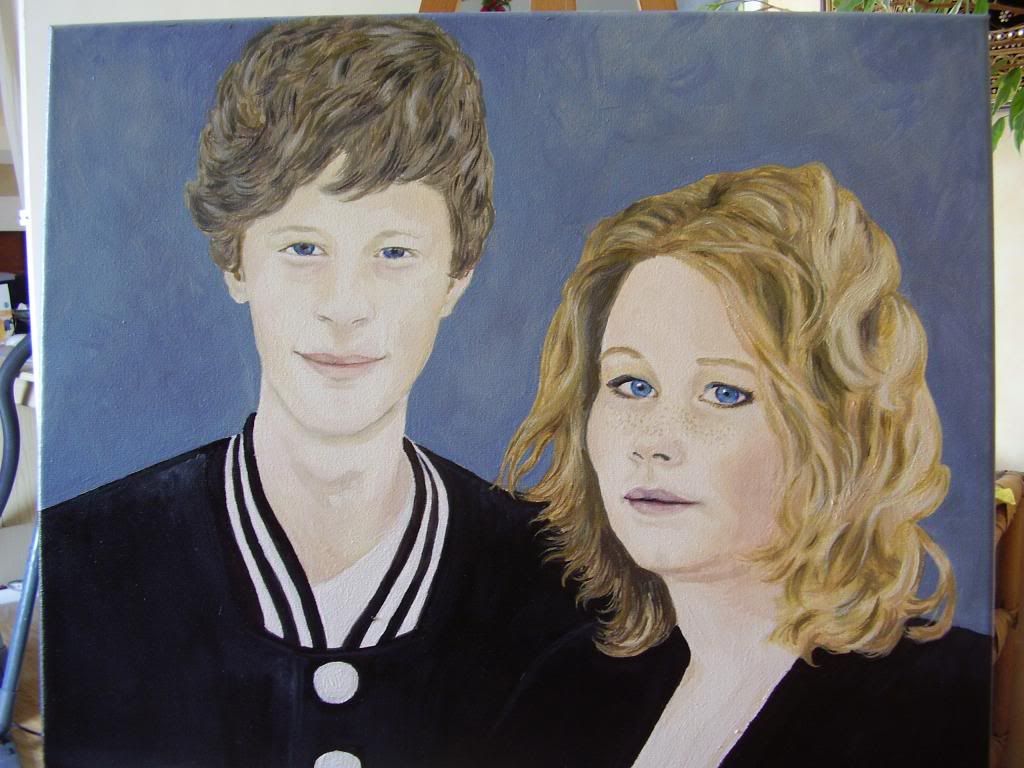
I had a commission to paint a portrait for people I know. I copied the photo in the same way I copied Woezel and Pip above.

This is the finished result (in case you are wondering why one of his eyes is bigger than the other and one ear is higher than the other... I didn't make a mistake he just isn't very symmetric ;-)


So do have a try at this yourself. You may be pleasantly surprised at your undiscovered talents!

donderdag 9 mei 2013

A Backpack With A Message

I love embellishing articles with beads, ribbons, ornaments and findings. The more the better. I love victorian crazy patchwork. In my opinion less is not always more.

In the past I have decorated a few bags in this manner.


Here you can see the ones I made for myself . I hang them on a mugholder behind a door in our utility room where they hang out of sight and out of the sun.

Recently I have been horrified bij de reports about the enormous gyres with plastic waste in our oceans. I wanted to play a very small part in stopping it getting worse.

Then I had an idea of how to bring this disaster to peoples attention without saying a word... I am quite a shy person and not someone who takes to the streets carrying a big banner.

I made a backpak which said all I wanted to.


I "decorated" it with pieces of plastic I had picked up off the streets and pictures off the internet.
To waterproof the pictures I stuck stickybackplastic on the front and back of the illustrations leaving a small rim all the way round when I cut them out so that I use that when sewing them on with nylon thread.
The labels with sculls on them I made with pieces of yellow card on which I drew the scull and crossed bones after which I stuk the same adhesive plastic on as I did on the illustrations.
Stop Zwerfvuil means Stop Litter in Dutch.
Plastics are the worst because the don´t rot and stay in our enviroment for hundreds of years.


Please take 6 minutes and 52 seconds to watch this youtube film to see what I´m talking about 

Thankyou

dinsdag 23 april 2013

Bottomless Pot

Would you throw this container away?


I must admit I was very tempted. This container has had a hole in it for several years. In the beginning it wasn´t that bad and I just put a piece of roof tiling over it. But as the years passed the hole just got bigger and bigger untill there was no bottom left.
" The time has come to let it go," I thought. But it was a nice size and it was very old as you can see. Then I had an idea! 
I got a piece of wire meshing larger than the bottom of the container and bent the corners upwards


Then I put a piece of cotton in to stop the soil from falling through the holes. I used an old cotton nappy ( diaper) but you could use a piece of sheet or towel.
It looks as if it is about to fall to bits but that is because it has been under the soil for about two years. I emptied the container especially for my blog.


Then I put on the bits of rooftiling (optional)


After that I put in the soil and the plants


You wouldn´t think it had no bottom if you didn´t know.
When I wrote this piece on my dutch blog someone posted that they had done the same thing with a ceramic container that had lost it´s bottom due to frost. She had placed the pot in a big saucer with hydroculture pellets in it and then filled it as normal.
As you see above sometimes when you think you have used something up completely you can still get some use out of it with a little alteration!

vrijdag 22 maart 2013

Defrost Your Car Windows Simply

We have come up with a simple way to defrost our car windows. No scraping or chemicals involved.
Only condition is that your car has to be parked near to your house.
When we see that the windows are frozen we get our small electric heater and an extension cord which we pass through our letterbox and place the heater between the front seats of the car. Then we go about our business and glance out of the window once in a while to see if the windows have defrosted yet. When they have we bring the heater indoors again. The car is defrosted and a lot less cold.


We have replaced the plug on the extension cord with a flat one so it will fit though our letterbox. If you live in Britain and your plug doesn't fit through yours OR you don't have a letterbox in your door you will have to open a window or your door slightly so you can pass the electric cord through.
We are very pleased with this solution and have used it frequently this winter.

donderdag 21 maart 2013

Simple Air Freshener

Sometimes you have smells in the home you want to mask quickly. I'm not talking of smells due to unhygienic circumstances or stale air but am thinking more of cooking smells or fish smells etc.
I have found that Sticking a piece of cotton  material on the radiator with a piece of low adhesive paper maskingtape and then dropping a drop of essential oil or perfume on it helps a great deal.
This only works it the heating is on of course. 
During summer or in warm countries you could lay the piece of material in the sun on the windowsill.


dinsdag 12 maart 2013

Decorating With Sequins

Once in a while I take a good look at the clothes I have in my drawers and cupboards. Often I'm surprised with what I find ,things long forgotten about appear before my eyes! A few years back I found a T-shirt in the bottom of a drawer of which I liked the colour but didn't like the cut. It was quite short so I couldn't tuck it into anything and quite wide at the bottom so it looked as if I didn't have a waist. As I stood holding it I had an idee! I could embellish it with sequins! I had bought some sequins with birthday money I had received so this was a good chance to use them.
I attach the sequins as follows. I stick the needle through the material en then through the hole in the sequin and then through a small bead and then back though the sequin and material. To do this I use the smallest quilting needle I can find. These are so thin that they will go through the hole in the bead easily. After this I make a small knot in the thread on the back of the material. Without cutting the thread I start on sewing on the next sequin a little bit further on. I started by attaching about two rows at once and continue to add rows till I think there are enough or I've had enough whichever comes first ;-)
Here's a close up photo


By attaching them in this way you don't see the thread they are sewen on with, unless you use a contrasting colour.
It looks like a lot of work but you can do it while watching the t.v. and you'll be finished before you know it!

This is the finished result


Perhaps you are now thinking, "you can attach al the sequins you want but that won't change the fact that it is too short and too wide".
Well, I have a long very thin cardigen and I wear the T-shirt under that when I go out to places where sequins are appropriate.

When my daughter was to get married a few years back she and her boyfriend had set the date for October the 1st. I had bought a very summery floral dress with short sleeves thinking I could just pull it off as the weather can still be very nice at the end of September, and beginning of October. But around that time the grandfather of my son inlaw died and they ended up going to a funeral instead of getting married and the wedding was postponed untill the end of October. Noway could I wear the dress I had bought so I went to look for something else.
I found a simple block coloured dress which I liked but because I bought it in a chainstore I was afraid that one of the guests would have exactly the same dress as I had. So I sewed a string of sequins a round the neckline which I cut off after the wedding. That way I could wear the dress during everyday life without looking as if I was going to the Oscars!

zondag 3 maart 2013

Decorating With Beads

I love embellishing things. Bags, jackets, clothes, shoes you name it, I have probably embellished it at some time or other.
One of my favorite methods is with glass beads. Once attached properly they can handle a knock or two and survive a spin in the washingmachine unlike delicate embroidery.
Instead of sewing them on one by one I have discovered that it is much faster and neater to first make a shape or chain en then sew them on the article you want. And when you want to get rid of it, just cut the beads off and save them for another project!
I have made a sequence of photo's using large beads to show you how I make a chain. I string them onto thin nylon thread or thin metal wire if I want to bend  it into a shape afterwards before attaching it to the article. I use nylon for things that have to be washed often as I don't know if the metal wire will rust over time or not.


etc. etc. till you get the required length.

Here is an  example of what you can do with it.


I made the heart in this way. I'm sorry about the rubbishy photo but you get the idea.
As well as a long string for edging or swirls you can make oval or more round shapes which you can use as flower petals, leaves or insect wings.


And so on... you can change the shape by adding or using less beads. The more you use the same amount the longer the shape becomes.

Here are some examples of what you can make with these.


And the finished result...


It looks like a lot of work but is finished before you know it!

zaterdag 2 maart 2013

Fabric Art

For years I have made all kinds of patchwork. There was a time when I thought that I would be lost without some kind of project. It even reached the point where I had a little tin with an "emergency project". This consisted of hundreds of little squares of fabric and hundreds of little squares of cardboard, a few pins and a needle, thread and a pair of scissors. I had done this because I thought that if I got ill and landed in hospital I wouldn't have anything to do! ( It didn't occur to me that I would be too ill to do anything but lie in my bed) Luckily I stayed healthy so I decided to start on the emergency project anyway. The end result was a patchwork top consisting of more than a thousand litte squares of fabric sewen together. At this point my interest in patchwork had wained and I had become very lazy. The thought of sandwiching and quilting the top became very daunting. I had everything I needed but just couldn't get myself to get started on it!
Then my father died... he had a house full of stuff and I kept finding all kinds of things in the back of cupboards and under beds etc. I also found a big gilt pictureframe. It was then when I got the idea! My heart started beating faster and I couldn't wait to get home and see if it would work....
Once home I got out the patchwork top and the size was right! I even had a little leftover round the edges.
I then got my stapelgun and stapeld the top onto the back of the frame with this result


I could now hang all my hard work on the wall without having to finish the thing!
I know you probably don't have a quilt top with more than a thousand pieces of material waiting to be finished lying around. But perhaps you could use some nice modern fabric to stapel behind an old frame you have. Something with big bold splashes of colour.
If you like the idea but don't have a frame you could hunt one down in a yardsale or thriftshop.
It's a simple way of making a big statement.

dinsdag 26 februari 2013

Children's Party Idea With Glass Paint

When my children were small we always had birthday parties at home. No visits to a zoo or cinema for us.
I always planned an afternoon with some food, some activity and a creative project. One of the most succesfull was making a tea light holder out of a drinking glass and glass paint.
For this is bought some inexpensive glasses in a store. With foresight I could have bought some at a yardsale or saved empty mustard jars etc.
This is a photo of the one my daughter made when she was about 10-years old


After protecting my table top I gave each child a unopened tin can to put their glass on. They can use the can as a pedestel to put the glass on so they can turn their glasses bij turning their cans and don't have to touch the wet paint.I had them put their glasses upside down on the can so they could also paint the base.
Use the most inexpensive paintbrushes that you can find because the paint will ruin them.

You can also decorate glass plates with the stuff. When I did this I painted the underside.
This one I made years ago. I stood it on a window ledge so the light could shine through.


As you see there is a small piece of paint missing. I have found that after years of sunlight the paint may crack and flake off a bit.
Some plates and saucers have patterns impressed in them. You can use these as a guide as to where to paint.


The next one is well past it's prime but I still want to show it to you as an example.


Last year I made "tiffany" candle/tealight holder using glass paint and self adhesive lead tape.


I bought a very inexpensive glass vase but you could look in a yardsale or thriftstore. Then I drew the lines where I wanted to stick the tape on with a permanent fineliner and painted the areas in the colours I wanted. When the paint was completey dry I stuck on the lead tape. 
This project is perhaps less suited for a childrens party because you have to wait untill the paint is dry before you can stick the tape on.
If you stick the lead tape on before you paint it makes the painting more difficult.
I hope I have inspired you!

maandag 25 februari 2013

Give Your Leather Couch A Facelift

If this was your couch would you buy a new one?


Last week my son said,"Don't you think it's time we bought a new couch?"
But I must admit that was before I had given it my special treatment. Last week it looked like this 


I bought this couch last century and as time flies it seems like only yesterday when we had the most terrible trouble to get it though the narrow door of our livingroom. We won't be able to get it out unless we hack it to pieces so I'm doing my best to lengthen it's life.
After we had it about 6 years a hole appeared at the front. It took a year for me to think of a way to fix it. At first I thought of cutting a large piece of leather from the back ( nobody would notice because it's backed onto a cupboard) and sewing/sticking it onto the seat part but I was afraid I wouldn't be able to do it neatly. Eventually I shoved a small piece of leather through the hole and then spreaded some glue on it and then pulled the edges of the hole together and stuck it down. I put something heavy on top untill the glue was dry. This worked very nicely and you could hardly see there had ever been een hole there!
The piece of leather I used I had saved from old leather articles which weren't in a good enough state to donate such as broken purses, gloves, shoes etc.
To get rid of the white stripes caused by tiny tears in the leather I use shoe polish! My couch is green with a blue undertone and I couldn't find shoe polish in the right colour so I used dark blue. I warmed the shoe polish a bit to make it softer and easier to spread out and then I got a clean cotton cloth and a lick of polish and rubbed the polish into the cracks. When all the white was gone I left the polish for a few hours to soak into the leather. Then I got a shoe brush and buffed the area untill it gleamed. After that I got a clean duster (a soft cotton cloth) and rubbed as hard as my little arms would let me. You will notice that your duster will turn blue or brown or black but this doesn't matter. This is to remove the excess shoe polish so it doesn't rub off on your clothes. When hardly any colour comes off anymore you're finished. I wouldn't let any visitors with a white skirt or trousers sit on the couch the first few days. I usually spread an old bath towel over the area just in case.
I have done this twice now and it works well for me. Last time I mixed some leather polish in with the shoepolish but I find this gives less of a shine. But this could be fine if you're couch is mat leather.
I would be lying if I said my couch now looks as good as new but thanks to this method my couch still had a few good years left in her!

woensdag 20 februari 2013

Hair Ornament

Those of you which have followed my blog before will know that I love "decorating" myself. I love jewelry, sequins and beads.
I am 50+ and my hair is getting pretty gray around the edges but that doesn't mean that I will resign to becoming drab and boring!
I used tot visit the website "going gray looking great" very often ( before they were only on facebook) and last time I read something about hairtinsel and how wonderfull silver tinsel looked in gray hair. So I had a look on google but was shocked to find 10 strands kost €5.00! I had some yarn which had silver wrapped around it so I spent a while unraveling some and knotted two strands in my hair. I was rather pleased with the result untill the next day when I brushed one strand out and two collegues thought they were helpfull when the pointed out to me there was "something"stuck in my hair!
So I had a good think about a decoration I could make that would look as if it was meant to be there.
I also like the "Jack Sparrow look" ( I'm talking about the hair, not the teeth) and that's when I got the idea to make this...


I looked in my stash for something I could use. I tend to hoard things that I think will be usefull in the future such as ribbons from presents and packaging and even christmas decorations. I also used some cross stitch yarn in the colour of my hair.


Then I got a piece of wire and a jump ring. I wanted to use wire as a base because I have curly hair and I thought it would look weird having a straight decoration in amongst my curls. With wire I could bend it any way I wanted so it would go with the flow of my hair. The Jump ring was so I could hang the decoration on a hairslide to secure it in my hair.


Then I cut all the strands to the length I wanted and attached them with very fine wire to the wire just under the jump ring.


After this I braided ( or if you're British platted) the strands and held them in place with a clothes peg.


Then I used a piece of the same thin wire to wrap around the strands a few times after which I slid a bead over the braid/plat. I hung an ornament on the two ends of wire I used in the base by bending the wire back after placing the ornament over it and wrapped the rest over the thin wire around it to tidy it up. Lastly I cut the ends of the strands all the same length.
When it was finished I ran to the mirror, eager to see how it looked....... I was very dissapointed. It looked really stupid! Though I'm convinced it would look really lovely on someone with thick, straight, long hair!
I haven't given up on the idea yet but I think I will make al shorter, less massive one for myself next time with no wire in it. That was a bad idea.
This one will make a good bookmarker! :-)

donderdag 7 februari 2013

Use Up Your Old Wallpaper

I am a bit of a hoarder. It hasn't got to the stage that you can't see the floor in my house anymore or I have piles of stuff which reach the ceiling but I do have a problem throwing things away. I just never know what I will be able to use in the future. As a result I had a big box of partial rolls of old wallpaper, some dating back to the '70's in one of my closets.
The wallpaper in my utility room was sunbleached and a bit tatty and needed replacing but I was put off by the idea that I would have to remove the cupboards from the wall and remove the heavy cupboards and washingmachine standing against it. My husband said "why don't you just paper around them?" At first I laughed en then I thought "why not?" and that's when I got the idea of using the short bits of wallpaper I had in the box in my cupboard. I could make a patchwork wall!
The old wallpaper on the wall was vinyl and as I was afraid the bits of paper I wanted to put over it wouldn't stick properly, I carefully removed the toplayer leaving a thin underlayer of paper on the wall.
Then I used my square quiltingruler to cut lots of squares EXACTLY the same size. This part is crucial! I did choose wallpaper similar in style and colour so I didn't get a mismatch. But you could use any paper you wanted for a more spectaculair effect if you so wished.
While sticking the pieces on I regularly used a spirit level to make sure I was going straight and I let the pieces fall behind the cupboards and washingmachine were possible so the patchwork paper didn't end abruptly and you couldn't see that I had cut corners ( excuse the pun ;-))
I was very pleased with the result. I only did one wall with the patchwork, painted two others white and papered the forth with a complete roll I also had. In the end it only cost me time because I already had everything.


I also had longer pieces which I used on the walls of my stairway.


This whole excercise has been a trip down memory lane for me. I kept thinking,"we had this pattern in the hall and this one in the bedroom"etc. AND I got rid of some of the wallpaper. I still have plenty more. I shall have to have a good think about what else I could do with it.

dinsdag 5 februari 2013

Organize Your Earrings

I love jewelry and feel absolutely naked without it. I also have a lot of it including earrings. Over the years a have made and bought lots of pairs both in shops and in yardsales. Though I must admit that I put new hooks on the ones I buy secondhand for hygiene reasons.
To organize them I used to hang them all on a metal clotheshanger ( the sort you get when you pickup your drycleaning). This wasn't the best solution because they tendend to slide to one side and often fell off.
Then one day I was looking on the internet for a better way to organize them  and came across a great Idea which I simplified a bit.
I hung a piece of stiff meshing from two pieces of wire which I attached to a towelrail which I had there already but you could just as well attach it to two hooks.


I can now hang my earings pair by pair in a very well organized fashion so I can find the pair I want in the fraction of the time I needed in the past.
The original idea had the mesh attached to the back of a pictureframe which was hung on the wall. I would have done this myself had it not been for the fact that my walls are covered in quilts and pictures etc.
If you want to try the version with the pictureframe make sure you make something on the back of the frame so it comes a bit away from the wall otherwise you won't be able to hook your earings on the mesh.

zondag 3 februari 2013

Lego/Playmobil Table

A long time ago ( although it seems like yesterday) when my children were young they played a lot with lego and playmobil. I would often step on small pieces of lego left lying around on the floor and I had to take care not to step on the creations they had made. If they had really done their best I would not tidy everthing up right away but leave it as it was so they could play with it another day.
Then I had an idea... Right in the back of a closet we had an old table which had belonged to my grandmother. We had kept it as an extra table in case we had guests and needed extra places set but it was never used.
It had legs which you could screw off and an extra leaf in the middle so you could extend it.
I thought it would be a nice and usefull idea to paint the top and use it as a table my children could play on. That way everything would not be left lying around on the floor to trip over.
Here is a photo of the smaller version. I haven't botherd to screw the legs on. After all, it's the top that matters.


I can't remember what kind of paint I used. Do take care to make the design of both parts correspond with each other so your version doesn't end up like mine.

This is the extended version 


My son had a lot of water themed Lego so I made a water/beach/land version but you can paint on anything you want whether it's a city theme, desert, moon surface or farm theme.
This table didn't stop me stepping on small pieces of Lego left on the floor but it did enable me to leave out the things they had made for as long as they wanted.
Nowadays we use the table for what it was meant for. We get it out of the cupboard when the children come home for Christmas etc.